Shrinking or Expanding the Virtual Hard Disks is a common task for
Limitation
There
- There is no virtual machine checkpoint
If there is a virtual machine checkpoint created, you need to merge or remove the VM checkpoint first. - Only VHDX files that can be expanded on the running Virtual Machine.
The VHDX disk type is Virtual Hard Disks format on the Windows 2012 and later. - The VHDX is attached to the iSCSI controller on the Virtual Machine.
If the VHD or VHDX is attached to the IDE controller, you need to turn off the Virtual Machine first.
Resize a Virtual Hard Disk with Hyper-V Manager
Hyper-V Manager allows you to resize a virtual hard disk whether or not a virtual machine owns it.
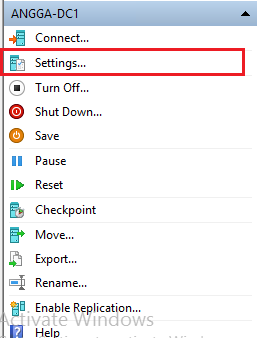
From the Hyper-V Manager, Select the Virtual Machine and click the VM Setting on the right panel
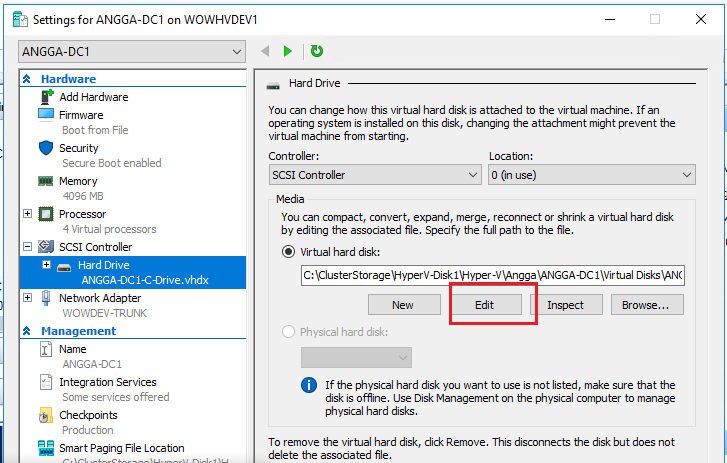
Locate the disk that you want to expand and click edit.
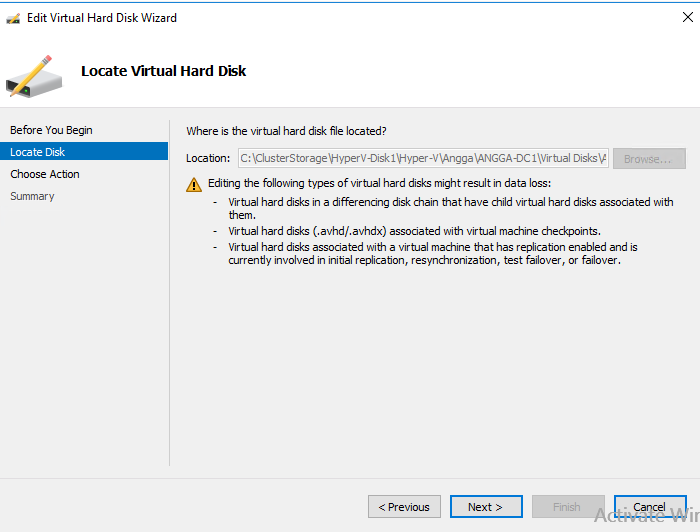
On the Edit Virtual Hard Disk Wizard screen as below, click next.
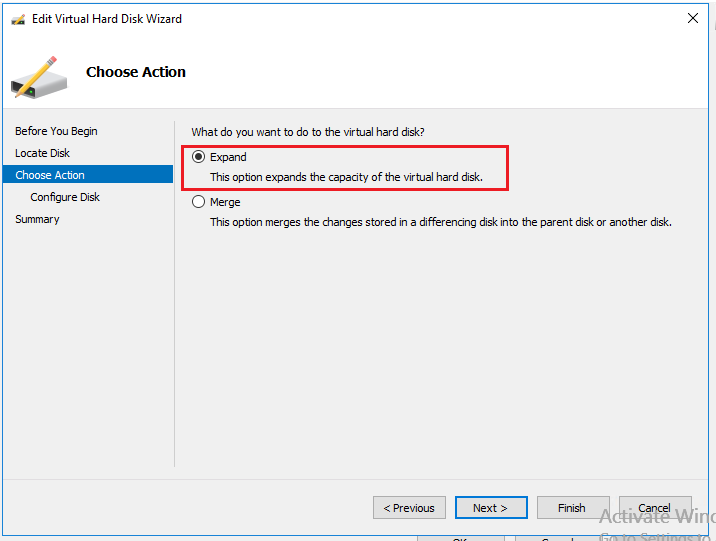
Select expand and click next.
Enter the value of the new size of VHDX. the new size should be greater than the current size.
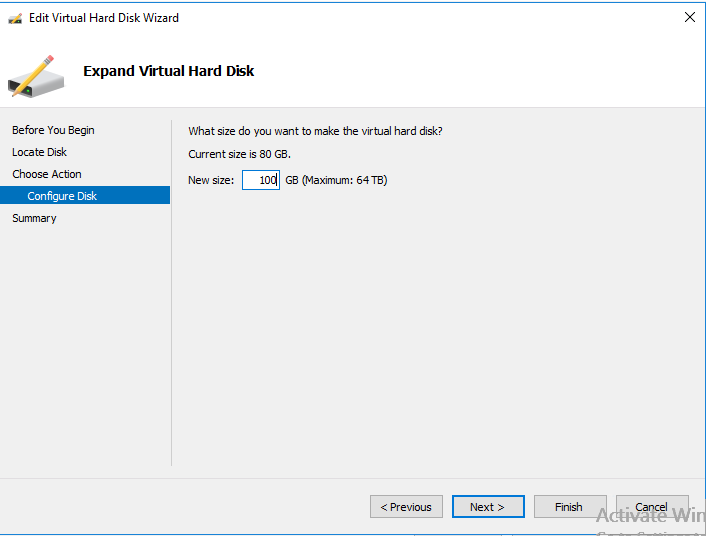
Review your setting and click finish.
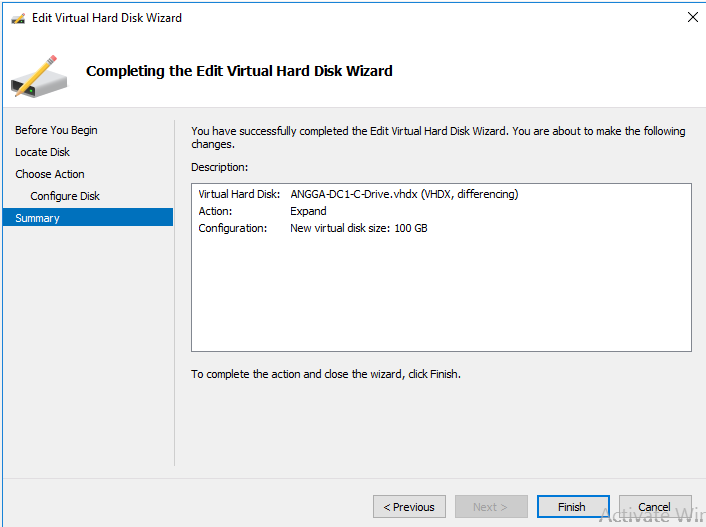
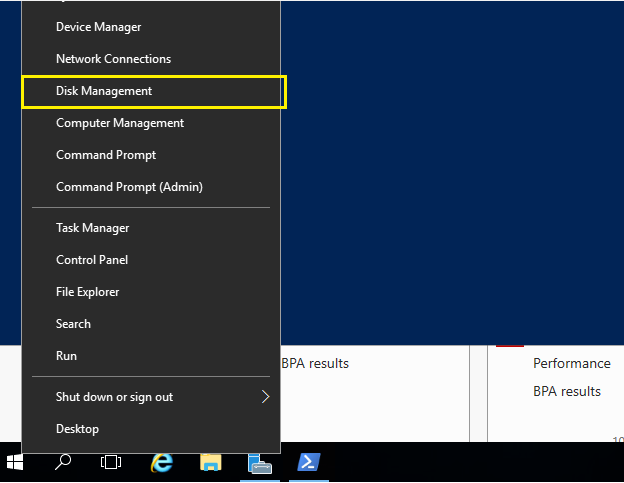
Once the virtual hard disk has been resized, you need to login to the VM to expand the partition. To expand the disk partition, open the Disk management or you can run diskmgmt.msc from the command prompt.
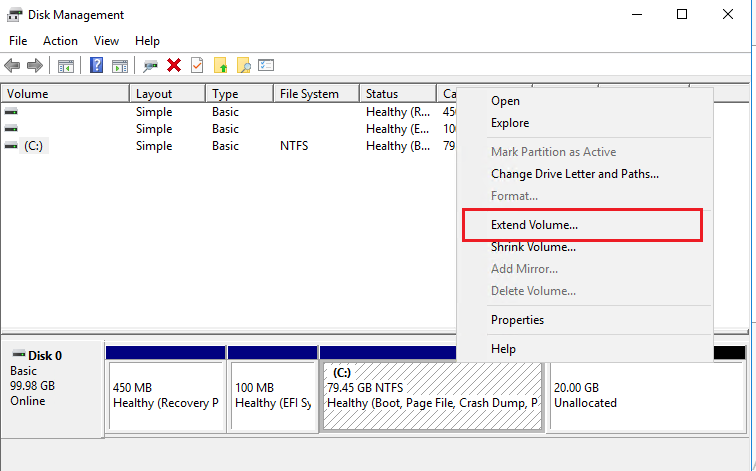
On the Disk Management, make sure the unallocated size is available on for the partition.
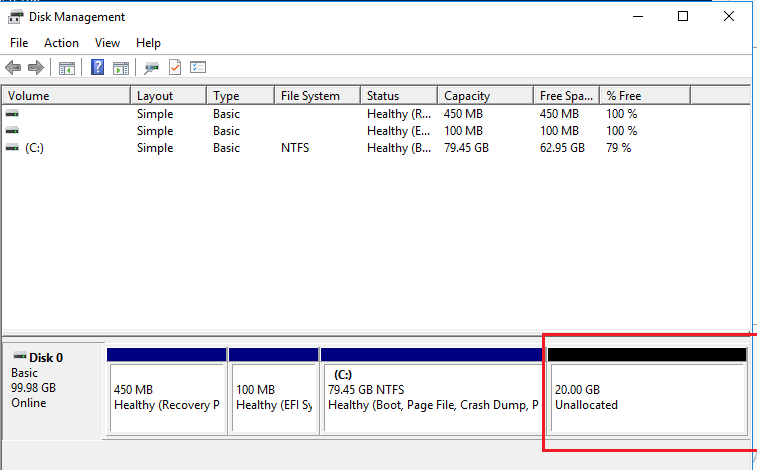
On the volume that you want to extend, right click and select “Extend Volume”. Please note, you can’t extend the volume that isn’t in order partition.
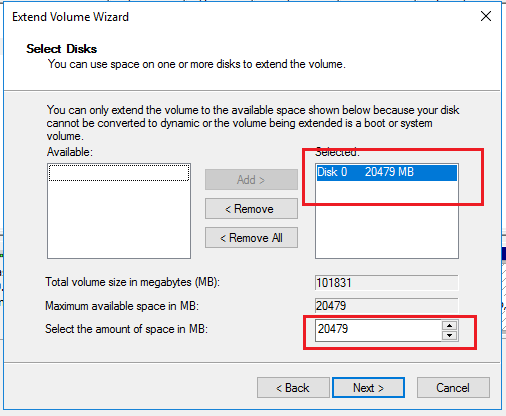
Select the available disk and size that you want to add to the existing volume.
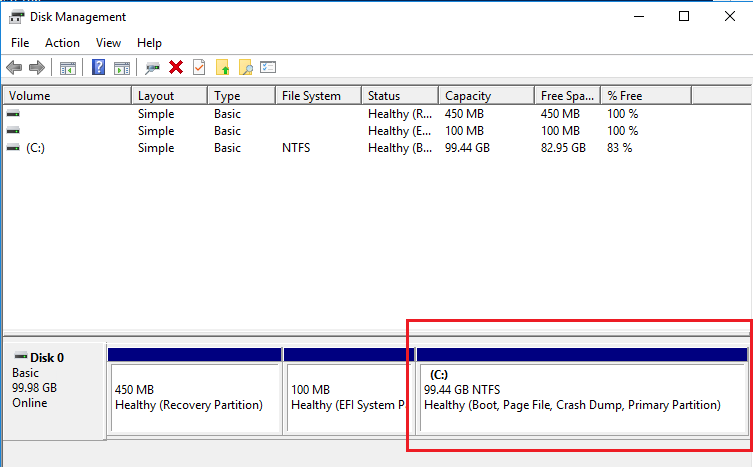
Review the changes.
Resize a Virtual Hard Disk with PowerShell
You can also use Resize-VHD
First, you need to get on which controller the Virtual Hard Disk that you want to expand is attached.
Get-VM -VMName "ANGGA-DC1" | Get-VMHardDiskDrive
After you get the “Controller Number” you can run the command below to expand the Virtual Hard Disks.
Get-VM -VMName "ANGGA-DC1" | Get-VMHardDiskDrive -ControllerNumber 0 | Resize-VHD -SizeBytes 100GBNote: you still need to login to the guest operating system to expand the volume from unallocated space.
We hope this article helped you learn How to Resize Virtual Hard Disk on the Running Virtual Machine. If you liked this article, then please share with the others. You can also find us on Twitter and Facebook.

